This How to... will show you how to utilize the multi-tab function. As in, "tabs within a tab". This how to will be utilizing the CG section of Ayato Hidaka's page as an example, will only apply to the Classic Editor and has a total of 9 steps.
Codes that Will be Used
- <tabber> <u>and</u> </tabber>
- {{#tag:tabber|
- {{!}}-{{!}}
- {{{#|}}}
- }}
Notes
- All codes must exhibit the same appearance as they are listed here, excluding the "#" sign that is in the fourth code.
- The third code is extremely crucial, as it separates the second tier tabs from each other.
- The code that has the "#" sign, is specifically for organization in the second tier tabs.
- The last code, incorporates all the material that is within that second tier tabs. Basically, consider it as "the key to the treasures in a room."
Terminology
Some of terminology may not be correctly used in computer sciences and coding but in order to prevent confusion a picture will be used to describe what these term mean in this how to.
Step 1
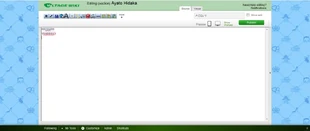
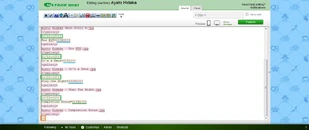
First, decide how you would like your tabs to be. Like all the tabs, this can be placed anywhere as well. Then, open the Source mode (denoted by the green box in the picture).
Begin with placing the <tabber> onto the page (denoted by the green line in the picture).
Step 2
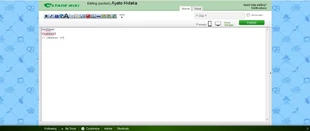
Then below <tabber> , add the first major tab's name. In this case, it is "Season 1". See the picture below.
Step 3
Next, add the {{#tag:tabber| {{!}}-{{!}} below the "Season 1".
Step 4
Now, after this step, it becomes crucial that you follow exacting as the steps are shown, because if you're missing or misplacing certain codes - it can create drastic differences in the final product.
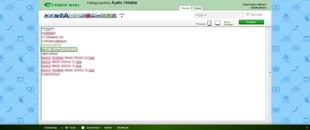
So, this will begin the second tier of tabs within the first major tab (which is Season 1 in this case). Begin by naming the first second tier tab. In this case, it is "Main Story", followed by the fourth code {{{#|}}} . but this time, replace the "#" sign with an actual number. Note green box in the image and follow exactly how it appears.
As in: name of first second tier tab, the "=" sign and then {{{1|}}} .
Step 5
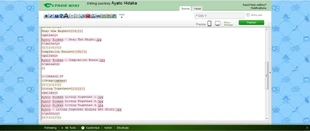
Close off this first second tier tab with {{!}}-{{!}}. As a reminder, this code will appear throughout this second tier tab, as it is crucial in distinguishing which tab is which tab. Notice the green box in the picture.
Step 6
Repeat these steps (starting from step 4) for the rest of the second tier tabs you need. Be sure to change the number in this code {{{#|}}} in an orderly fashion.
Step 7
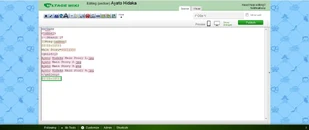
So, by now you should have all that you need in this first second tier tab:
Notice
In the images:
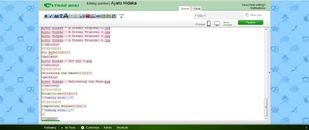
- You can see that the blue lines is this code: {{{#|}}} ; you will notice that the numbers are different. This is for more of organization but when the final product is viewed, somewhere within one of the tabs there will be a random Template:1} .
- The green boxes with this code: {{!}}-{{!}}, is utilized to separate the different tabs. Here's what happens when it is removed or not present:
- Lastly, the orange box which contains this code: }} . Notice the importance of this code:
Step 8
Now, repeat the same thing for your second major tab and its second tier tabs. Starting from step 2, follow exactly as shown. Be sure not to forget any of the necessary codes. You still need to separate each second tier tab from each other (using {{!}}-{{!}}) and concluding the entire second tier section (using }} ).
Step 9
Now that you've added all that you want in the major tabs and their second tier tabs. To conclude the entire thing, add </tabber> to finish. As shown below:
And you're all done! Congratulations, you did it! As always, it will take time to fully understand how to utilize this, so don't rush and take your time. And if you need any help, feel free to ask the admins or other editors.


